Browse to the installation folder. By default this is C:\Program Files\Wind Software\WindSFTP
Run WindSFTP.exe which is the configuration utility.
Host Settings:
Run WindSFTP.exe which is the configuration utility.
Host Settings:
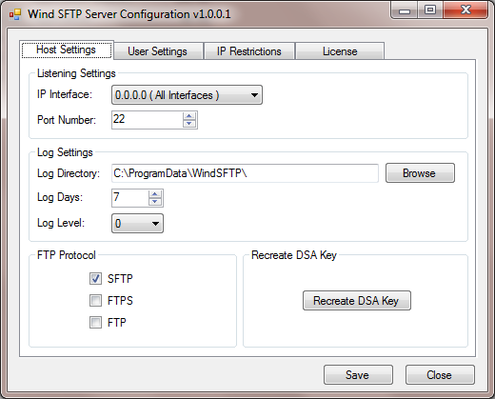
IP Interface - Choose whether the service is available locally or on every network interface.
Port Number - Choose the port number which the service will listen on.
Log Directory - Choose the directory where the server will save the log files.
Log Days - Choose the number of days that the server will save log files.
Log Level - Choose the logging level. The greater the number the more information which is saved to the logs.
FTP Protocol - Choose the type of server you wish to host.
Recreate DSA Key - When the server is started for the first time a DSA key is created. If for any reason you wish to recreate this then click this button.
User Settings:
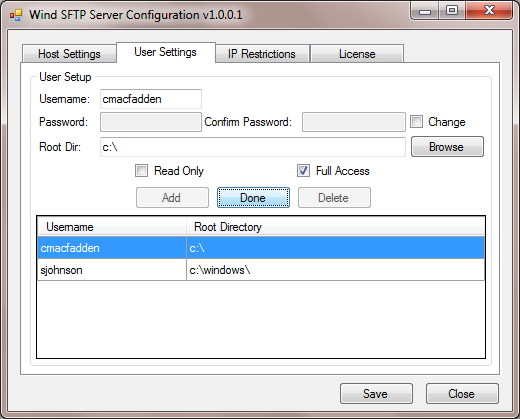
Username - The unique username which the user will login with.
Password & Confirm Password - The users password.
Root Dir - The root directory for the user after they login.
Read Only - Allows the user to only read files. They cannot delete or create files.
Full Access - The user has full read and write access. They can create and delete files.
After entering a users details click the "Add" button. This will add the users to the grid below.
To Edit a user select their name from the grid and choose the "Edit" button. After editing is complete choose the "Done" button.
To Delete a user select their name from the grid and choose the "Delete" button.
IP Restrictions:
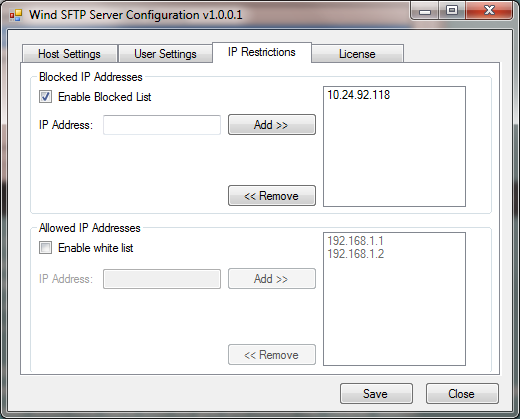
Blocked IP Addresses
When enabled any address configured in this list will automatically be rejected by the server and not allowed to login even if they have a valid username and password.
Allowed IP Address
When enabled any address which is not in this list will automatically be rejected by the server and not allowed to login even if they have a valid username and password.
License:
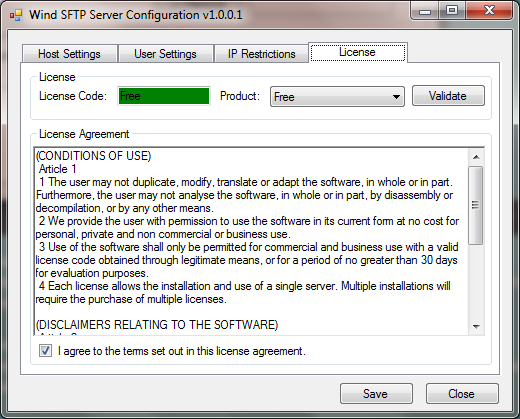
License Code: If you are using the Basic or Professional version enter your license code here.
Product: Choose the product you are licensed for Free, Basic or Professional.
Validate button: Validates the entered license key on the system.
License agreement: You must read and agree to the license terms before any of the other tabs will be enabled for configuration.
Service Startup:
Product: Choose the product you are licensed for Free, Basic or Professional.
Validate button: Validates the entered license key on the system.
License agreement: You must read and agree to the license terms before any of the other tabs will be enabled for configuration.
Service Startup:

To start the SFTP Service open Services.msc
Right click on WindSFTP and choose Start. The service will automatically start when the server is booted.
Right click on WindSFTP and choose Start. The service will automatically start when the server is booted.
